This weekend I was on a mission to make a unique earring holder for my upcoming craft show. What I ended up with is just toooo cute to use as an earring holder lol so now I have to figure out a plan B for that but I wanted to share with you how to make your very own super cute Christmas tree!

Supplies:
1- 1x3x8 board
1-1x2x6 board
1-scrap piece of wood for base
1 1/4" wood screws
1-star
green, yellow, and brown paint
This super cute tree was sooooo easy to make too!! Here we go....
Start by cutting your boards

I cut the following dimensions:
24", 20", 16", 12" and then helpful hubby cut the ends on a 45 degree angle. The 1x2 was actually a scrap piece of wood that we found in the cull lumber bin at Home Depot but it's dimension is 28". Cut the base of the tree also. We used a 1x6 scrap piece cut to 9" wide.
Sand the front piece of wood really well. The 1x3's at Home Depot are not the best cuts so they have rough sides. I used a 60grit sand paper to smooth out the front side. While we were making our weekly Home Depot stroll, we discovered a handy tool called a Planer!! this will definitely be a tool that makes its way into our garage in the future!!
Paint the wood:
I used martha stewart bonsai green

Now turn the "good" side so that it is facing downward

Arrange the boards the way you are going to want them to look. I screwed in the screw from the backside so it wouldnt show on the front. Use a nail to make a pilot hole then screw in the screw

for the star, I actually used a 1" nail because the star was a little thinner than my other boards. I also recommend that you put a dab of wood glue before you screw it in place. I forgot to do this on mine.

Now drill a screw into the base. To find the center, mark an x on your board. Simply use a pencil and draw a line from corner to corner. you will find a perfect center every time!! The screw will stick up from the other side--this is OK

Now twist your assembled tree onto the screw

Turn it until it is tight. I should have painted my base before I did this part but I forgot and so I had to paint it afterwards. I used brown.
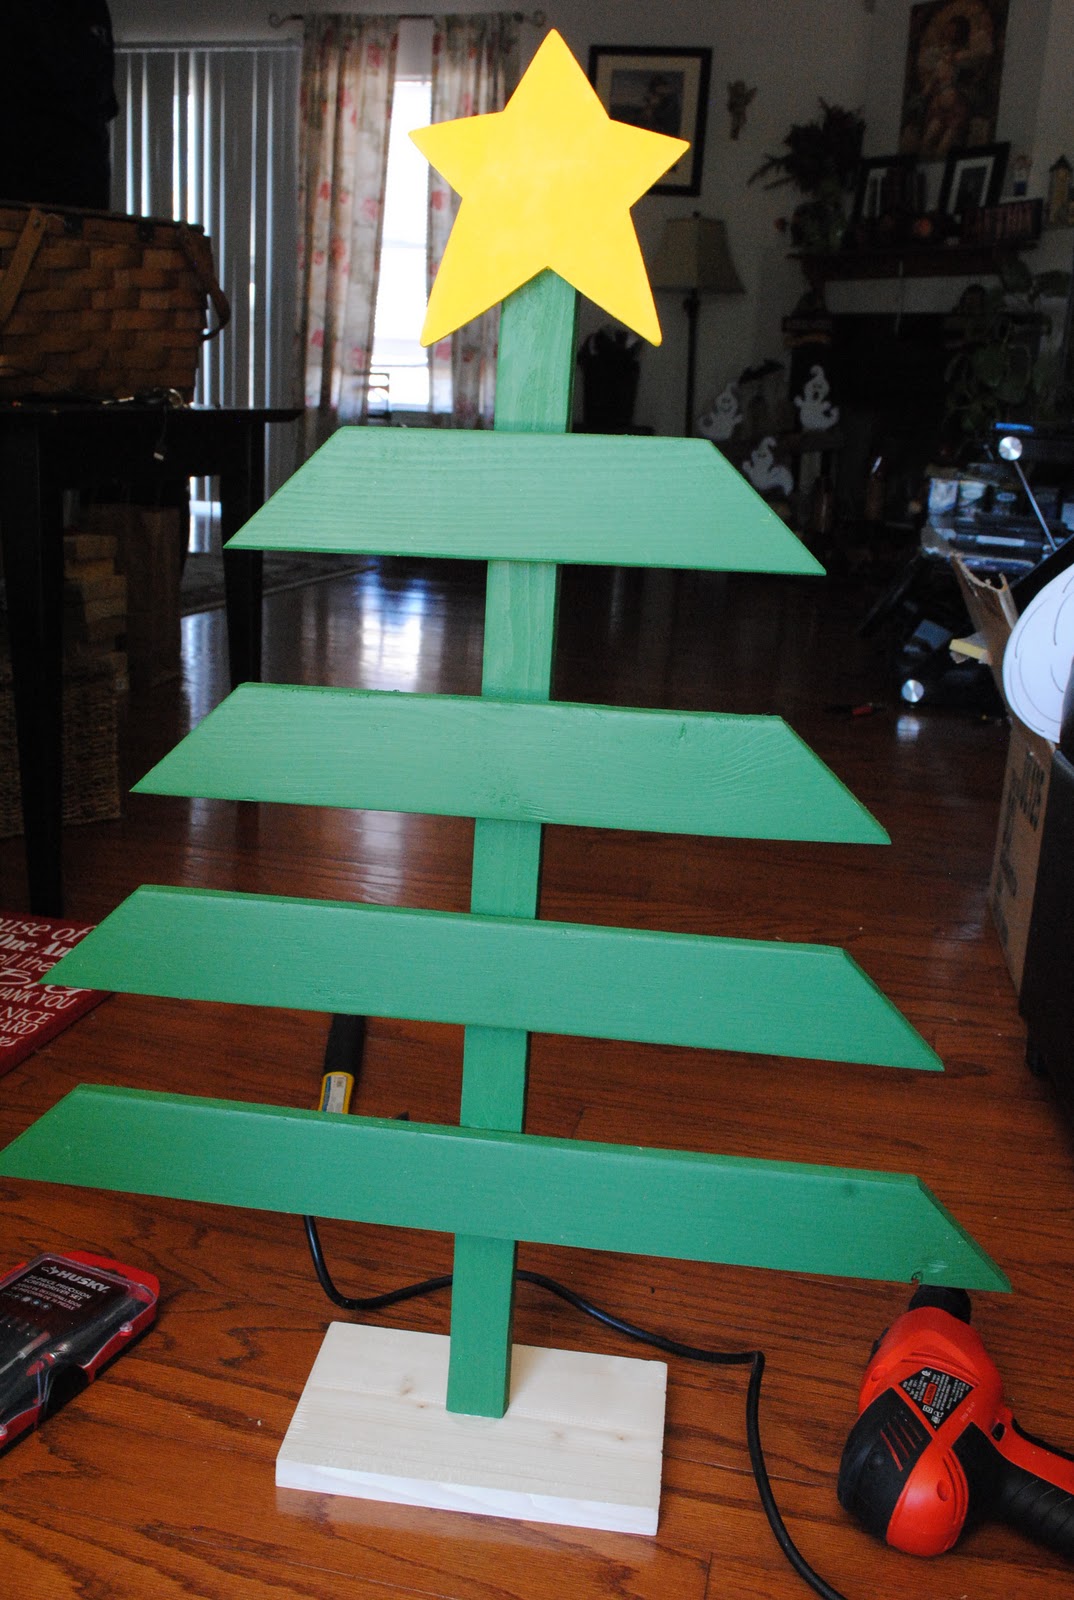
Here is what you will have so far. Now you can add any words you want. I have a handy vinyl cutter so of course, I cut my own words out. If you dont have a vinyl cutter, you can simply write the words on with white paint.

I use transfer tape to apply my vinyl. I also ended up painting the stem of the tree "trunk" brown.
and viola you have a finished tree:
Let's break it down:
1x3x8---$1.64
1x2---$.51 (I got mine from scrap bin)
1x6---$.51 (also from scrap bin)
Star---$1.29
Paint----already had
Vinyl----cut myself
Screws---already had
Total---$3.95!!
Super cheap---Super easy----Super Cute!
If you are interested in making one and would like to purchase the vinyl decal, I do offer vinyl for sale--HERE!
No comments:
Post a Comment